Welcome to Downpour Decor! We are here to help you create your own rain chain, a unique and beautiful way to bring the beauty of nature into your home. Rain chains are a great way to add a touch of whimsy to your outdoor space, and they can be used to create a stunning focal point in your garden or patio. With our DIY guide, you will learn how to craft your own rain chain from start to finish. We will provide step-by-step instructions, as well as helpful tips and tricks to make sure your rain chain is a success. So, let’s get started!
How to Create a Unique Rain Chain for Your Home: A Step-by-Step DIY Guide
Rain chains are a unique and attractive way to add a decorative touch to your home. They are also a great way to divert rainwater away from your home’s foundation and into a rain barrel or other collection system. This step-by-step guide will show you how to create a unique rain chain for your home.
Materials Needed:
-Copper or aluminum chain
-Copper or aluminum cups
-Copper or aluminum rings
-Copper or aluminum clasps
-Wire cutters
-Pliers
-Drill
-Screws
-Screwdriver
-Measuring tape
Step 1: Measure the length of the chain you need. Measure from the gutter to the ground and add an extra foot for the chain to hang down. Cut the chain to the desired length using wire cutters.
Step 2: Attach the cups to the chain. Start at the top of the chain and attach the cups using the copper or aluminum rings. Make sure the cups are evenly spaced along the chain.
Step 3: Attach the clasps to the chain. Use the pliers to attach the clasps to the chain at the top and bottom. This will help keep the chain secure and in place.
Step 4: Drill holes in the cups. Use the drill to make two holes in the bottom of each cup. This will allow the water to flow freely from cup to cup.
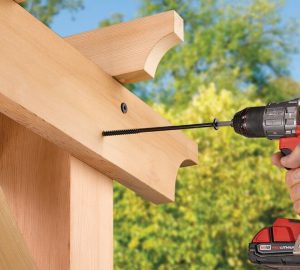
Step 5: Attach the chain to the gutter. Use the screws and screwdriver to attach the chain to the gutter. Make sure the chain is securely attached and won’t come loose in heavy rain.
Step 6: Test the rain chain. Once the chain is securely attached, test it out by pouring water into the top cup. The water should flow freely from cup to cup and into the collection system below.
Your unique rain chain is now complete! Enjoy the beauty and functionality of your new rain chain and the peace of mind that comes with knowing your home is protected from water damage.
Adding a Touch of Nature to Your Home with a Custom Rain Chain: Tips and Tricks for Crafting Your Own
Adding a touch of nature to your home can be a great way to bring a sense of peace and tranquility to your living space. One way to do this is by crafting your own custom rain chain. Rain chains are decorative elements that are designed to catch and direct rainwater away from your home. They can be made from a variety of materials, including copper, aluminum, and even bamboo. Crafting your own rain chain can be a fun and creative way to add a unique touch to your home. Here are some tips and tricks for crafting your own custom rain chain.
First, decide on the material you want to use for your rain chain. Copper is a popular choice for its durability and attractive appearance. Aluminum is also a good option, as it is lightweight and easy to work with. Bamboo is a great choice for a more natural look.
Next, decide on the design of your rain chain. You can choose from a variety of shapes and sizes, such as a traditional cup-style chain or a more intricate design. Consider the size of your home and the amount of rainfall you typically receive when deciding on the size of your rain chain.
Once you have chosen the material and design of your rain chain, it’s time to start crafting. Start by cutting the material into the desired shape and size. If you are using copper or aluminum, you can use a hacksaw or metal shears to cut the material. If you are using bamboo, you can use a saw or a sharp knife.
Once you have cut the material to the desired size and shape, it’s time to assemble the rain chain. Start by attaching the top of the chain to the gutter of your home. You can use a hook or a bracket to secure the chain in place. Then, attach the bottom of the chain to the ground or a container to catch the rainwater.
Finally, you can add some decorative touches to your rain chain. You can use beads, stones, or other decorative elements to give your rain chain a unique look. You can also paint the chain to match the color of your home.
Crafting your own custom rain chain is a great way to add a touch of nature to your home. With a little creativity and some basic tools, you can create a unique and beautiful rain chain that will add a sense of peace and tranquility to your living space.Downpour Decor’s DIY Guide to Crafting Your Own Rain Chain is an excellent resource for anyone looking to create a unique and beautiful rain chain for their home. With detailed instructions and helpful tips, this guide makes it easy to create a rain chain that is both aesthetically pleasing and functional. Whether you are looking to add a touch of elegance to your garden or simply want to make a practical addition to your home, this guide will provide you with the information you need to create a beautiful rain chain.