Welcome to Window Wonders! We are here to help you create stylish windows with our DIY curtain rods. Our curtain rods are easy to install and come in a variety of styles and colors to match any décor. We offer a wide selection of rods, finials, brackets, and other accessories to help you create the perfect window treatment. With our help, you can create a beautiful and unique look for your windows that will last for years to come. So let’s get started and create some Window Wonders!
How to Create a Custom Look with DIY Curtain Rods
Creating a custom look for your home can be a daunting task, but with the right tools and a little bit of creativity, it can be done. One way to create a unique look is to make your own curtain rods. DIY curtain rods are a great way to add a personal touch to any room and can be made with a variety of materials. This guide will provide step-by-step instructions on how to create your own custom curtain rods.
Materials Needed
Before you begin, you will need to gather the necessary materials. You will need a drill, screws, a saw, a measuring tape, a level, and the material of your choice for the rod. You can use wood, metal, or PVC pipe for the rod. You will also need the appropriate hardware for the type of rod you choose.
Step 1: Measure and Mark
The first step is to measure and mark the area where you want to hang the curtain rod. Measure the width of the window and mark the wall at the desired height. Use a level to make sure the marks are even.
Step 2: Cut the Rod
Once you have marked the wall, you can begin cutting the rod. Measure the length of the window and cut the rod to size. If you are using wood, you may need to sand the edges to make them smooth.
Step 3: Attach the Brackets
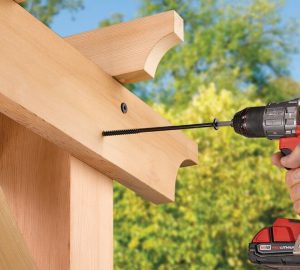
Next, you will need to attach the brackets to the wall. Use a drill to make pilot holes for the screws and then attach the brackets. Make sure the brackets are level and secure.
Step 4: Install the Rod
Once the brackets are in place, you can install the rod. Slide the rod into the brackets and secure it with screws. Make sure the rod is level and secure.
Step 5: Hang the Curtains
The final step is to hang the curtains. Measure the length of the curtains and mark the wall at the desired height. Use a level to make sure the marks are even. Attach the curtain rings to the rod and then hang the curtains.
Creating your own custom curtain rods is a great way to add a personal touch to any room. With the right materials and a little bit of creativity, you can create a unique look that will be sure to impress.
Tips for Installing DIY Curtain Rods for a Window Wonder Makeover
1. Measure the window and determine the size of the curtain rod you need. Make sure to measure the width of the window and the length of the rod you need.
2. Choose the type of curtain rod you want to install. Consider the style of the room and the type of curtains you plan to hang.
3. Gather the necessary tools and materials. You will need a drill, screws, wall anchors, a level, and the curtain rod.
4. Mark the wall where you will install the curtain rod. Use a level to ensure the rod is straight.
5. Drill pilot holes into the wall and insert wall anchors.
6. Secure the curtain rod to the wall using the screws.
7. Hang the curtains on the rod and adjust the length as needed.
8. Enjoy your new window wonder makeover!Window Wonders: DIY Curtain Rods for Stylish Windows is an excellent resource for anyone looking to add a unique and stylish touch to their windows. With easy-to-follow instructions and a wide variety of materials to choose from, Window Wonders makes it easy to create beautiful and unique curtain rods that will add a touch of style to any window. Whether you’re looking for a simple and affordable solution or something more elaborate, Window Wonders has something for everyone. With its wide selection of materials and easy-to-follow instructions, Window Wonders is the perfect resource for anyone looking to add a unique and stylish touch to their windows.