Transforming your outdoor space into a comfortable and stylish relaxation area doesn’t have to require expensive purchases or hiring professionals. DIY patio furniture offers a cost-effective and customizable way to design a personalized outdoor living space where you can unwind, entertain guests, and enjoy nature. Whether you’re looking to create a cozy nook for reading or a full-scale entertainment area for hosting parties, DIY patio furniture allows you to achieve a unique look that fits your specific needs and preferences. In this article, we’ll explore how to create your own outdoor furniture, the materials you’ll need, and some creative ideas to get started.
The Benefits of DIY Patio Furniture
Creating your own patio furniture has several advantages beyond saving money. When you choose the DIY route, you gain full control over the design, style, and materials used in your outdoor furniture. This allows you to make something truly unique and perfectly suited to your space. Here are some of the key benefits:
1. Customization
With DIY patio furniture, the possibilities are endless. You can create furniture that fits your personal style, whether that’s a rustic, modern, or minimalist look. Want a sectional sofa that fits perfectly into the corner of your patio? Or a table with a built-in firepit? DIY allows you to bring your vision to life.
2. Cost Savings
High-quality patio furniture from big-box stores or designer brands can be expensive. By creating your own pieces, you can save a considerable amount of money. You can also repurpose materials or use salvaged wood and other affordable supplies to keep costs low.
3. Satisfaction and Pride
There’s a sense of accomplishment that comes with building something from scratch. Completing a DIY project gives you the satisfaction of knowing that you created a beautiful, functional piece of furniture with your own hands. This personal touch can make your outdoor space feel even more special.
4. Durability and Quality
By handpicking your materials and building the furniture yourself, you have control over the durability and longevity of your pieces. Unlike some mass-produced furniture, you can ensure your patio furniture is built to last and withstand outdoor elements, whether that means adding extra sealing to wood or choosing weather-resistant cushions.
Essential Materials for DIY Patio Furniture
Before you start building your DIY patio furniture, it’s important to gather the right materials. The type of materials you choose will depend on the style and design of your furniture, as well as the weather conditions in your area. Here are some commonly used materials for outdoor furniture:
1. Wood
Wood is a popular choice for DIY patio furniture because it is versatile, easy to work with, and offers a natural aesthetic that blends well with outdoor spaces. Cedar, teak, and pressure-treated pine are excellent options due to their resistance to the elements. Cedar and teak are naturally weather-resistant and have a beautiful grain pattern that can enhance the look of your furniture.
If you choose wood, make sure to treat it with a weather-resistant sealant or paint to prevent rotting, fading, or damage from the sun, rain, and humidity. You can also opt for reclaimed wood to give your furniture a rustic or vintage vibe.
2. Metal
Metal furniture is durable, stylish, and offers a sleek, modern look. Aluminum, steel, or wrought iron are all great choices for DIY outdoor furniture. While metal furniture can be heavier and more difficult to work with, it is extremely durable and can be painted in various colors to match your outdoor décor.
A big advantage of metal furniture is that it requires very little maintenance compared to wood. However, it is important to protect metal surfaces with a rust-resistant coating to ensure they last for many years outdoors.
3. Concrete
Concrete is an unconventional yet trendy option for DIY patio furniture. It provides a modern, industrial look and can be molded into various shapes and sizes. Concrete furniture pieces like tables or firepits are perfect for a minimalist or contemporary outdoor space. You can either cast your own concrete slabs or use precast concrete blocks for building furniture.
Although concrete is heavy and requires some expertise to work with, its durability and low-maintenance nature make it an appealing choice for a variety of outdoor designs.
4. Cushions and Fabrics
To make your patio furniture more comfortable, adding cushions and upholstery is key. Choose weather-resistant fabrics, such as Sunbrella or acrylic, which are designed to resist fading, mold, and mildew. For cushions, consider foam that is outdoor-rated, so it can withstand moisture without becoming too heavy or uncomfortable.
Don’t forget to consider the color and pattern of your fabric to match your outdoor theme. Opt for colors that complement your surroundings and won’t fade over time.
5. Recycled Materials
Another excellent option for DIY patio furniture is to repurpose and recycle old furniture or materials you already have. Pallets, old crates, and reclaimed wood can all be transformed into beautiful outdoor furniture. Not only does this save you money, but it’s also an eco-friendly choice that helps reduce waste.
Step-by-Step Guide to Building DIY Patio Furniture
Now that you have an understanding of materials, it’s time to dive into the process of creating your own furniture. Let’s walk through the basic steps of building a simple DIY outdoor bench, which can be customized for your patio:
Step 1: Gather Your Materials
For a simple wooden bench, you’ll need the following materials:
- 4 pieces of wood for the legs (2×4 or 4×4 for a sturdy frame)
- 4 pieces of wood for the seat slats (1×4)
- Screws (exterior-grade wood screws)
- Sandpaper
- Weatherproof wood sealant or outdoor paint
Step 2: Measure and Cut
Measure the length, width, and height you want for your bench. Cut the wood pieces accordingly using a saw. Make sure to cut the legs evenly and to the desired height, while ensuring the slats will fit comfortably together to form the seat.
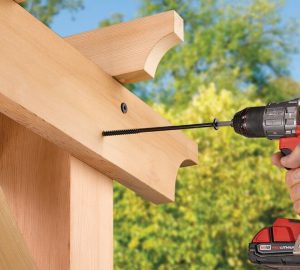
Step 3: Assemble the Frame
Start by assembling the frame of the bench. Attach the legs to the frame using screws. Make sure everything is square and level as you go, ensuring stability.
Step 4: Attach the Seat Slats
Once the frame is assembled, attach the slats for the seat. Space them evenly, leaving small gaps between each slat to allow for water drainage. Use screws to secure the slats to the frame.
Step 5: Sand and Seal
Once the bench is assembled, use sandpaper to smooth the edges and remove any rough spots. Afterward, apply a coat of weather-resistant sealant to protect the wood from the elements.
Step 6: Add Cushions (Optional)
For added comfort, consider adding outdoor cushions to the seat. You can either buy pre-made cushions or make your own using foam and weather-resistant fabric.
Building your own DIY patio furniture is a rewarding project that allows you to create a custom outdoor space tailored to your personal taste and needs. From selecting the right materials to assembling the pieces, the process is both fun and fulfilling, and the result is a unique, sustainable, and cost-effective outdoor relaxation area. Whether you want to create a cozy reading nook, a stylish dining set, or a fully furnished entertainment area, DIY furniture gives you the freedom to design and build pieces that suit your style. With the right tools and a bit of creativity, you can transform your patio into a beautiful and functional outdoor haven.