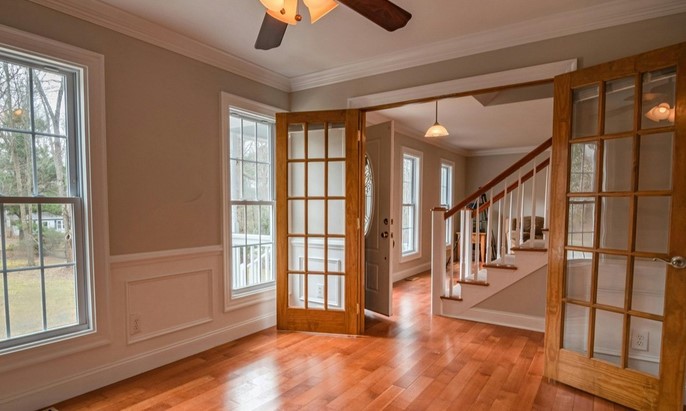
You turn the key, step across the threshold of your new apartment, and immediate excitement collides with a harsh reality: beige walls, outdated laminate countertops, and a lease agreement that explicitly threatens your security deposit if you so much as drive a nail into the drywall. Studies show that over 35% of households live in rental properties, yet the vast majority feel trapped in space that feels like a sterile hotel room rather than a personalized home.
In my ten years of hands-on home improvement work, I’ve managed property restorations, consulted for landlords, and transformed dozens of restrictive spaces. I can assure you that living in a leased property doesn’t mean settling for ugly interiors. By leveraging modern materials engineering and smart layout principles, you can execute high-impact rental friendly hacks that completely transform your living space without violating a single clause of your lease contract.
Plaintext
                     THE RENTAL TRANSFORMATION MATRIX

   Traditional Renovation                  Rental Friendly Hacks
┌──────────────────────────┐            ┌─────────────────────────┐
│ • Permanent structural   │            │ • Non-destructive, dry  │
│   modifications          │            │   installation systems  │
│ • High capital expense   │   ──────►  │ • 100% reversible       │
│ • Forfeits security      │            │ • Preserves full        │
│   deposit                │            │   security deposit      │
│ • Zero portability       │            │ • High asset reusability│
└──────────────────────────┘            └─────────────────────────┘
Why Rental-Friendly Transformations Demand an Agile Mindset
Think of upgrading a rental apartment like customizing a high-performance laptop running on a guest account. You cannot rewrite the core operating system or solder new components directly onto the motherboard, but you can attach high-speed external drives, high-resolution monitors, and custom peripherals that completely upgrade your user experience.
When executing rental friendly hacks, your primary technical objective is achieving aesthetic impact while preserving the underlying substrate—whether that substrate is 1980s drywall, outdated hollow-core doors, or cracked linoleum flooring.
Here is why adopting an agile, non-destructive approach to property optimization works so well:
-
Substrate Preservation: Protecting original finishes ensures you receive 100% of your security deposit back upon move-out inspection.
-
Capital Efficiency: You spend money on portable hardware, lighting, and modular furniture that you can pack up and take to your next home.
-
Rapid Deployment & Removal: Modular, adhesive-based upgrades can be installed over a weekend and safely uninstalled in a single afternoon.
Core Surfaces: High-Impact Non-Destructive Solutions
Over a decade on job sites, I’ve tracked the evolution of non-permanent building materials. Today’s removable materials are light-years ahead of the cheap contact paper and flimsy foam tapes of the past.
1. Removable Micro-Vent Peel-and-Stick Vinyl
Modern self-adhesive vinyl films feature micro-vent channels on the adhesive backing. This engineering allows trapped air bubbles to escape during application, creating a smooth finish that mimics real marble, butcher block, or quartz over tired kitchen counters.
-
Best Application: Kitchen countertops, backsplash tile covers, and bathroom vanity tops.
-
Key Advantage: High water resistance with clean release adhesives that leave zero sticky residue upon removal when heated with a standard hairdryer.
2. Tension-Mounted Architectural Verticality
When you cannot drill into wall studs, use structural tensioning. Heavy-duty floor-to-ceiling tension poles and spring-loaded hanging systems use vertical compression forces to support open shelving, room dividers, and heavy planters.
3. Interlocking Floating Vinyl Plank (LVT)
Floor tiles glued directly to subfloors are a renter’s nightmare, but click-lock luxury vinyl planks float completely free above existing floors. You simply lay down a thin foam underlayment over the landlord’s ugly tile, click the planks together, and secure the edges with temporary quarter-round molding.
| Upgrade Focus Area | Material / Tool Used | Structural Integrity Level | Removal Timeframe |
| Countertops | Polymeric Architectural Vinyl | High (Heat & Water Resistant) | 30 minutes (with heat) |
| Flooring Overlays | Floating Click-Lock LVT | Very High (Heavy Foot Traffic) | 1–2 hours |
| Wall Decor / Art | Heavy-Duty Hook-and-Loop Tapes | Medium (up to 15 lbs per strip) | 5 minutes |
| Cabinet Upgrades | Drill-Free Magnetic Hardware | High (Daily Mechanical Use) | 10 minutes |
Technical Step-by-Step Installation Protocols
Executing seamless rental friendly hacks requires proper surface preparation and material physics. Here are two technical installation protocols that deliver professional-grade results.
Plaintext
                  ADHESIVE SURFACE PREPARATION

 ┌────────────────┐     ┌────────────────┐     ┌────────────────┐
 │ Degrease Surface│ ──► │ Isopropyl      │ ──► │ Apply Vinyl /  │
 │ (TSP / Soap)   │     │ Alcohol Wipe   │     │ Strip          │
 └────────────────┘     └────────────────┘     └────────────────┘
                                                        │
                                                        ▼
                                               ┌────────────────┐
                                               │ Cure Time      │
                                               │ (24 Hours)     │
                                               └────────────────┘
Protocol A: Seamless Backsplash Vinyl Application
-
Surface Degreasing: Clean the existing wall or tile substrate with a Trisodium Phosphate (TSP) substitute or isopropyl alcohol to remove cooking oils, grime, and soap scum.
-
Substrate Levelling: If applying vinyl over deep tile grout lines, fill the recessed lines with removable painter’s tape or thin foam strips to create a perfectly flat plane.
-
Squeegee Application: Peel back 2 inches of backing paper, align the top edge with a bubble level, and press down using a felt-edged vinyl squeegee at a 45-degree angle to push air outward.
-
Edge Sealing: Trim excess film with a sharp utility knife along cabinetry borders, and apply a thin bead of removable, clear static-seal caulk along sink edges to block moisture intrusion.
Protocol B: Swapping Cabinet Hardware Without Drilling
-
Remove Original Pulls: Unscrew existing landlord handles using a manual screwdriver. Bag all screws and hardware together, label them, and store them safely for move-out day.
-
Measure Center-to-Center Hole Spacing: Measure the exact distance between screw holes (standard sizes are 3 inches or 128mm).
-
Install Adjustable-Span Pulls: Choose modern matte black or brushed brass handles featuring adjustable mounting posts. Slide the posts to match the existing hole spacing, thread the bolts through from behind, and hand-tighten.
Pro Tips & Hidden Warnings from an Expert
After ten years evaluating property damage and fixing DIY mistakes, I’ve assembled critical field insights that keep your home looking incredible while protecting your security deposit.
Pro Tip: Never pull removable wallpaper or adhesive vinyl off a dry wall at a 90-degree angle. Always apply low heat using a standard hairdryer on medium setting to soften the acrylic adhesive polymers, then peel the film back flat against itself at a 180-degree angle. This simple technique prevents the adhesive layer from tearing off drywall paper or paint topcoats.
Hidden Pitfalls to Avoid:
-
The Overweight Adhesive Hook Hazard: Adhesive strips carry weight ratings calculated under ideal conditions on non-porous surfaces. On painted drywall, reduce rated load capacities by 30% to prevent the adhesive from tearing away the top coat of paint overnight.
-
Beware of Unsealed Water Traps: When installing peel-and-stick tiles near sinks or shower perimeters, water can seep into unsealed seams. Water trapped beneath vinyl destroys the landlord’s subfloor, creating unseen mold growth that will cost you your deposit.
-
Never Paint Landlord Fixtures Without Written Consent: Even if you plan on painting cheap wood cabinets back to white, landlords often view unapproved painting as structural damage, resulting in professional restoration bills charged directly to you.
Take Control of Your Living Space
Your home should be a personal sanctuary that reflects your style and supports your daily routine, regardless of who holds the property deed. Rental friendly hacks bridge the gap between temporary leasing and long-term comfort, giving you the freedom to optimize your space safely, intelligently, and economically.
By choosing high-quality removable materials, understanding surface preparation, and preserving every original fixture, you build an elevated living environment today without compromising your lease agreement tomorrow.
What is the most challenging feature in your current rental apartment, or what DIY hack are you planning to tackle next? Drop your layout questions and project stories in the comments below, and let’s optimize your space together!