You step into your freshly renovated living room, expecting to admire the new hardwood flooring, only to turn on your central HVAC and watch a snowstorm of fine, white drywall dust rain down from every supply vent. That heart-sinking moment happens to thousands of homeowners every year. Fine construction particulate doesn’t just sit on finished surfaces; it migrates upward into the attic space, settles into porous insulation, and recirculates through your home’s air duct network for months after the contractors pack up their tools.
In my ten years overseeing residential structural overhauls and deep retrofits, I’ve seen clean project sites ruined by a simple oversight: failing to isolate the roof cavity. Installing a properly engineered Attic Dust Barrier is not an optional extra—it is the ultimate firewall protecting your home’s indoor air quality ($IAQ$), insulation value, and HVAC mechanical health during heavy remodeling.
Plaintext
                  DUST MIGRATION DYNAMICS

   Unprotected Attic Space                 Sealed Dust Barrier System
┌──────────────────────────┐            ┌─────────────────────────┐
│ • Thermal stack effect   │            │ • Negative pressure isolation
│ • Contaminated insulation│   ──────►  │ • Zero particulate bypass│
│ • Ductwork infiltration  │            │ • Preserved IAQ & filters│
│ • Long-term dust release │            │ • Clean insulation envelope
└──────────────────────────┘            └─────────────────────────┘
Why Construction Contamination Spreads Through the Attic
Think of your home during a interior renovation like a gigantic chimney. Warm air inside the construction zone naturally rises toward the ceiling—a natural fluid dynamic phenomenon known as the thermal stack effect.
As that rising air searches for an exit, it forces microscopic gypsum dust, silica particulate, and sawdust through light fixtures, attic access hatches, and unsealed ceiling joists directly into your roof space.
When you install a engineered Attic Dust Barrier, you break this stack effect by sealing off the attic opening, creating a physical and pressure-controlled containment zone that traps fine particles before they reach your home’s structural framing and insulation layers.
Failing to isolate your attic space leads to severe long-term home performance issues:
-
Insulation Performance Degradation: Fine construction dust coats loose-fill cellulose and fiberglass batts, clogging air pockets, absorbing moisture, and permanently reducing the material’s thermal $R\text{-value}$.
-
HVAC Mechanical Wear: Dust pulled into return air drops clogs evaporator coils, damages blower motor bearings, and drastically reduces airflow efficiency.
-
Respiratory Hazards: Crystalline silica from drywall compound and masonry cutting becomes trapped in attic spaces, re-entering living areas through natural air exchange over time.
Technical Mechanics: Designing an Effective Attic Containment System
Creating an airtight temporary enclosure demands the right combination of materials, pressure dynamics, and mechanical support systems. Simply taping up thin painter’s plastic will end in failure the moment air pressure shifts.
Plaintext
               CONTAINMENT LAYER MECHANICS

   Telescoping Support Pole
           │
           ▼
  [========= Ceiling Surface =========]
  │  ===============================  │ ── 6-Mil Polyethylene Film
  │  |                             |  │
  │  |  Negative Air Machine /     |  │
  │  |  HEPA Filtration Unit       |  │
  │  |  [=== HEPA Filter ===]      |  │
  │  |         ◄── Air Flow        |  │
1. Sheeting Thickness and Tensile Strength
Forget cheap 1-mil or 2-mil painter’s drop cloths. An effective containment curtain requires 6-mil flame-retardant polyethylene sheeting.
Thicker 6-mil plastic resists tears from sharp wood framing, withstands air pressure drops caused by negative air machines, and meets local building code fire safety requirements for temporary job site containment.
2. Spring-Loaded Telescoping Support Systems
To secure your containment barrier without damaging finished drywall or crown molding, use adjustable spring-loaded telescoping poles paired with non-marring head plates.
These poles press the polyethylene film firmly against ceiling joists and floor surfaces, creating a tight seal under mechanical tension without requiring nails or permanent screws.
3. Magnetic Magnetic Access Points & Zipper Doors
A dust containment curtain is useless if workers leave flaps open when moving equipment. Installing heavy-duty self-closing magnetic zippers or double-stitched adhesive zippers creates a sealed airlock, allowing easy crew access while maintaining containment integrity.
| Containment Spec | Standard Painter’s Plastic | Engineered 6-Mil Attic Dust Barrier |
| Material Thickness | 0.5 mil – 2.0 mil | 6.0 mil heavy-duty virgin polyethylene |
| Puncture Resistance | Very Low (Tears easily on joists) | High (Tear-stop cross-laminated resin) |
| Pressure Stability | Fails under fan movement | Withstands negative HEPA fan pressure |
| Reusability | Single-use / Disposable | Multi-project reusable |
| Fire Code Rating | Unrated | ASTM E84 Class A Flame Spread rated |
Step-by-Step Installation Protocol for Homeowners and Builders
Setting up a high-performance dust barrier system requires a systematic approach. Follow this proven field protocol to isolate your attic hatch or ceiling demolition area before demo work begins.
Step 1: Pre-Clean and Seal Openings
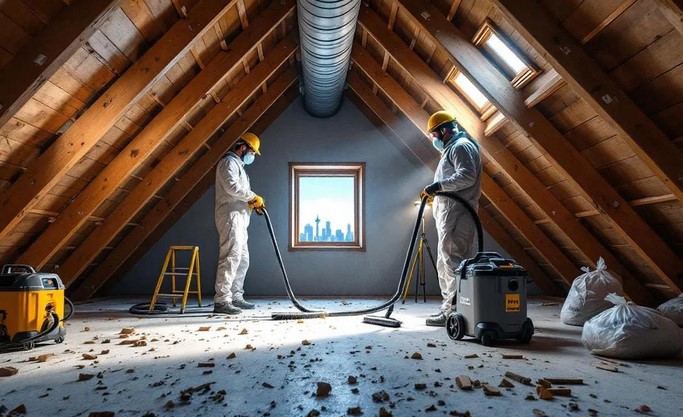
Before erecting containment, vacuum around the attic access hatch or ceiling opening using a HEPA-filtered shop vacuum. Seal off surrounding HVAC supply vents with magnetic vent covers or heavy plastic film to prevent dust from entering return ducts during installation.
Step 2: Establish the Pole Perimeter
Measure your floor-to-ceiling height and set up spring-loaded support poles every 4 to 5 feet along the perimeter of the containment area. Unroll your 6-mil poly sheeting, leaving an extra 12 inches of plastic on both floor and ceiling surfaces to form sealable overlap flaps.
Step 3: Mechanical Fastening and Edge Sealing
Press the top edge of the poly film against the ceiling using telescoping pole top plates. Secure all perimeter edges—where plastic meets walls and floors—using high-tack, low-residue builder’s tape or painter’s tape backed by heavy cloth tape.
Weighted foam-filled seal bars along the floor prevent air from lifting the bottom edge of the curtain.
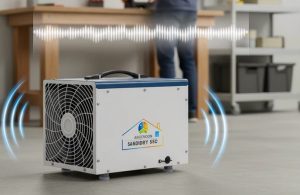
Step 4: Establish Negative Air Pressure
To guarantee zero particulate bypass, place a portable HEPA negative air machine inside the containment zone, running a flex duct through a sealed opening in the barrier to vent scrubbed air outside the home.
This creates a negative pressure differential, calculated using air change dynamics:
$$\text{Air Changes Per Hour (ACH)} = \frac{\text{Fan CFM} \times 60}{\text{Containment Volume }\left(\text{ft}^3\right)}$$
Target a minimum of $6\text{ to }12\text{ ACH}$ within the work area. Negative pressure ensures air flows into the containment zone through microscopic gaps rather than pushing hazardous dust out into clean living areas or up into the attic cavity.
Pro Tips & Hidden Warnings from the Field
After ten years evaluating job site failures and managing dust remediation, I’ve gathered crucial field intelligence that separates novice setups from professional-grade containment.
Pro Tip: Always tape a clear document pocket or viewing window onto the exterior side of your dust barrier. This allows you to check internal dust levels, monitor HEPA air scrubber operation, and verify negative pressure status without opening the barrier zipper and breaking the pressure seal.
Hidden Pitfalls to Avoid:
-
The “Duct Tape Drywall Tear” Mistake: Never apply standard silver duct tape directly to painted drywall or finished woodwork. The strong adhesive will tear off paint topcoats and paper backings upon removal. Use professional 14-day painter’s tape or dedicated barrier edge tape designed for clean release.
-
Beware of Thermal Bridging and Condensation: If working in an unconditioned attic during winter, sealing off warm ceiling air can cause moisture condensation to form on the underside of your cold plastic barrier. Maintain proper roof space ventilation to prevent mold growth on ceiling joists.
-
Never Turn Off HEPA Scrubbers Overnight: Fine drywall dust particulate remains suspended in air for up to 12 hours after grinding or cutting stops. Leave your HEPA air scrubber running continuously throughout the active demolition phase to filter airborne particles before taking down containment curtains.
Protect Your Investment from the Top Down
A successful home renovation should leave you with beautiful new spaces—not years of lingering air quality problems, ruined HVAC components, and contaminated attic insulation. Installing a well-engineered Attic Dust Barrier is a simple, cost-effective site protection measure that pays massive dividends in health, safety, and structural preservation.
By choosing heavy-duty 6-mil flame-retardant materials, maintaining negative air pressure, and properly sealing every perimeter edge, you safeguard your home against unseen construction contamination.
Are you planning a home renovation project soon, or have you ever dealt with construction dust spreading into your attic and air ducts? Share your experiences and project questions in the comments below, and let’s keep your job site clean!