I spent a freezing January evening a few winters back auditing a charming 1920s Craftsman bungalow. The homeowner couldn’t understand why her heating bill had spiked by 40% despite cranking the thermostat to 74°F. As we walked through the hallway, I held a simple smoke pen along the base of her solid oak front door—the thin trail of smoke was instantly blown sideways into the room by a rushing current of frigid air.
When I measured the gap, it was barely a quarter of an inch tall. Yet according to building envelope studies, a single 1/4-inch gap under a standard 36-inch exterior door leaks as much conditioned air as a two-inch hole punched directly through your brick wall. You are essentially leaving a window cracked open 24 hours a day, seven days a week.
Plugging these invisible thermal breaches doesn’t require replacing expensive exterior doors or tearing into drywall. Installing a high-performance draft stopper is one of the fastest, most cost-effective sealing solutions to stabilize indoor temperatures, lower utility bills, and restore comfort to your home.
The Physics of Thermal Infiltration: Stack Effect and Pressure Gradients
To understand why small gaps cause massive heat loss, we have to look at how air moves through a building envelope. Heated air rises toward upper levels due to buoyancy—a thermal phenomenon known as the stack effect.
As warm air escapes through attic vents and upper ceiling penetrations, it creates a negative pressure zone at the lower levels of your home. This suction draws cold, unconditioned outdoor air directly through under-door gaps, window sashes, and unsealed floor thresholds.
+-----------------------------------------------------------------------+
|                    DOOR BOTTOM SEAL PERFORMANCE                       |
+--------------------------+---------------------+----------------------+
| Seal Type                | Air Infiltration    | Durability & Lifespan|
+--------------------------+---------------------+----------------------+
| Unsealed 1/4" Gap        | Severe (High Leakage)| N/A                  |
| Fabric Weighted Snake    | Moderate (Pushed)   | 1 – 2 Seasons        |
| Silicone Twin-Roll Slide | Low (Dual Barrier)  | 3 – 5 Years          |
| Heavy-Duty Aluminum Sweep| Minimal (Air-Tight) | 8 – 10+ Years        |
+--------------------------+---------------------+----------------------+
Think of your home’s heating system like a bucket filled with warm water. If there is a hole in the bottom, adding more hot water doesn’t solve the underlying problem—it just wastes fuel. A quality air barrier acts like a fitted rubber plug, locking in energy before it escapes.
Selecting the Right Draft Stopper Mechanism
Not all door seals are built for the same environment. Choosing the ideal style depends on floor substrate, doorway traffic, and exterior weather exposure.
1. Fabric Weighted Snakes (Free-Standing)
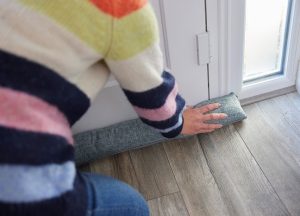
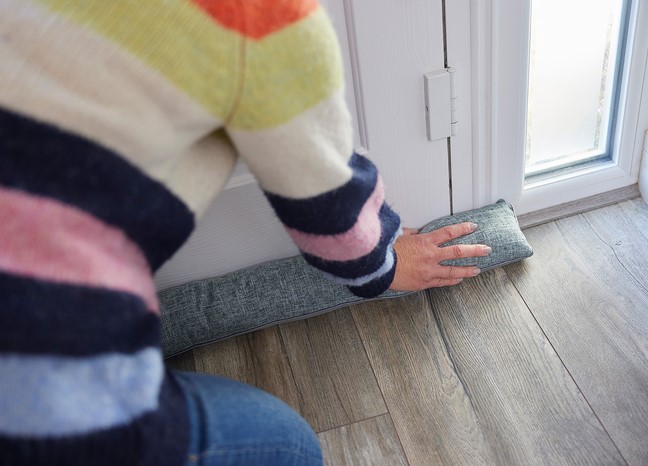
Filled with gravel, sand, or heavy polyester batting, these soft fabric tubes sit loosely against the door base.
-
Best For: Interior bedroom doors or low-traffic secondary entryways.
-
Key Advantage: Zero installation tools required; easily moved out of the way when not needed.
2. Slide-On Twin Silicone Seals
Featuring double foam or silicone rolls joined by a flat fabric strip, these slide directly underneath the door panel to move with it as it opens and closes.
-
Best For: Smooth hardwood, tile, or laminate interior floors.
-
Key Advantage: Provides dual-sided thermal insulation (both interior and exterior faces) simultaneously.
3. Surface-Mounted Aluminum and Silicone Sweeps
Constructed from rigid extruded aluminum tracks holding flexible silicone, EPDM rubber, or dense nylon brush fins, these screw directly into the exterior door face.
-
Best For: Exterior entrance doors facing harsh weather, wind-driven rain, and heavy foot traffic.
-
Key Advantage: Maximum durability, weatherproofing, and mechanical holding force.
Step-by-Step Installation: Fitting a Rigid Door Sweep
Installing an exterior draft stopper sweep with a flexible silicone blade ensures a long-lasting, airtight seal without binding against your flooring.
       [ STEP 1 ]             [ STEP 2 ]             [ STEP 3 ]             [ STEP 4 ]
+----------------------+   +--------------+   +----------------------+   +----------------------+
| Door Threshold Prep &|-->| Track Length |-->| Slot Pilot Drilling  |-->| Height Adjustment &  |
| Gap Measurement      |   | Cutting      |   | & Fastener Torque    |  | Friction Testing     |
+----------------------+   +--------------+   +----------------------+   +----------------------+
Step 1: Cleaning and Gap Verification
Close the door fully and inspect the gap between the door bottom and the threshold. Clean away dirt, debris, and old weatherstripping glue using isopropyl alcohol and a wire brush.
Step 2: Measuring and Trimming the Aluminum Track
Measure the exact horizontal width of the door leaf when closed.
-
Mark the extruded aluminum sweep track to size using a carpenter’s pencil.
-
Use a fine-tooth hacksaw to cut the metal track clean.
-
Trim the flexible silicone blade insert using utility shears, leaving a 1/16-inch extension on each end to seal firmly against door jamb moldings.
Step 3: Aligning and Fastening
Place the sweep against the lower interior face of the door (or exterior face for outward-swinging doors). Position the silicone blade so it flexes slightly against the threshold without buckling.
Mark your mounting screw slots onto the door panel. Drill shallow pilot holes using a 3/32-inch drill bit, then secure the sweep using the provided stainless steel screws.
Pro Tip: Never drill mounting screws through the center of the mounting slots immediately! Fasten screws loosely in the middle of the oval slots first. This allows you to slide the sweep up or down to fine-tune the seal height before locking hardware down permanently.
Expert Advice: Critical Pitfalls and Pro Guidelines
Throughout my decade working on residential building performance, I have seen small installation errors ruin expensive door finishes or cause premature hardware failure.
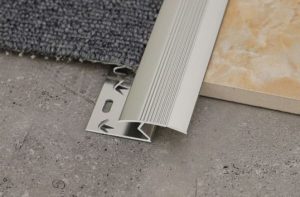
Hidden Warning: Avoid installing rigid rubber sweeps on doors opening over plush pile carpeting! The continuous drag will pull carpet fibers loose, place excessive strain on door hinges, and tear the rubber seal within a few months. Use an automatic drop-down door bottom for carpeted transitions instead.
Keep these core operational principles in mind throughout your weatherization project:
-
Check Door Plumb and Squareness: Older wood doors often sag on their hinges. Verify that the threshold gap is uniform across the entire width before trimming your sweep to avoid light gaps at the latch side.
-
Pair with Door Jamb Weatherstripping: A draft seal at the door bottom only solves one part of the problem. Replace compressed foam weatherstripping along the side jambs and top header to complete the thermal envelope.
-
Maintain Exterior Drain Weep Holes: When installing exterior-facing sweeps, ensure the rubber blade directs rainwater outward onto the sloped threshold sill rather than trapping standing water against the wood core.
Troubleshooting Draft Seal Performance Issues
If cold air continues to enter your home or your door becomes difficult to latch, use this quick reference matrix to diagnose and fix the issue.
+---------------------------------------------------------------------------------+
|                         DRAFT SEAL TROUBLESHOOTING GUIDE                        |
+----------------------+--------------------------+-------------------------------+
| Symptom Observed     | Underlying Cause         | Recommended Corrective Action |
+----------------------+--------------------------+-------------------------------+
| Door Binds / Stays   | Sweep Set Too Low /      | Loosen mounting screws; slide |
| Difficult to Latch   | Friction Against Threshold track up 1/16" in slotted holes   |
| Air Leaks at Corners | Missing Corner Seals /   | Add self-adhesive foam corner |
|                      | Trimming Track Too Short | wedge pads to jamb bottom     |
| Rubber Cracks Quickly| Excessive Sun Exposure / | Upgrade to UV-resistant EPDM  |
|                      | Cheap Vinyl Material     | or silicone blade insert      |
+----------------------+--------------------------+-------------------------------+
When diagnosing stubborn air leaks around entryways, turn on all interior bathroom exhaust fans and kitchen range hoods to depressurize the house artificially. Pass a lit incense stick or smoke pen along the door perimeter to reveal exact micro-draft locations instantly.
Sealing Your Home for Maximum Efficiency
Optimizing your home’s thermal efficiency doesn’t require massive capital expenditures or complex renovations. Integrating a high-quality draft stopper along vulnerable exterior door bottoms closes thermal leaks, reduces HVAC equipment wear, and keeps your living space comfortable in every season.
Are you currently auditing your home for winter drafts or retrofitting an older entry door? Drop your questions, floor setup, or current weatherization challenges in the comments below—I’d love to help you optimize your space!