You are sitting in a dark basement at 8:00 PM, trying to replace a faulty GFCI outlet that keeps tripping. You grab a utility knife or a pair of side-cutting pliers to peel back the plastic sheath, press down a little too hard, and hear a faint snap. You just nicked the solid copper core.
Now, you have to cut the wire back, strip it again, and pray you have enough slack left in the junction box. It is an excruciatingly frustrating cycle—and one that quietly compromises the electrical safety of your entire home.
In my more than ten years of troubleshooting residential wiring and managing full-scale electrical upgrades, I have seen this exact scenario play out hundreds of times. Homeowners spend small fortunes on high-end outlets, smart switches, and breaker panels, yet rely on pocket knives or blunt pliers to make critical electrical connections.
Investing in a dedicated wire stripper tool is the single fastest way to transform tedious electrical maintenance into a precise, professional-grade operation.
The Hidden Danger of Improper Stripping: Why the Wire Stripper Tool Matters
When you strip electrical insulation using an improvised blade, you run a high risk of scoring or gouging the underlying metal conductor. While a tiny nick in a piece of copper might seem harmless, it fundamentally alters the physics of electrical transmission.
 IMPROPER METHOD (Utility Knife)          PRECISION METHOD (Wire Stripper Tool)

    [ PVC Insulation ]                       [ PVC Insulation ]
   ───────┐        ┌───────                 ───────┐        ┌───────
          │  Gouge │                               │ Clean  │
   ───────┼───┐ ┌──┼───────                 ───────┼───┐    └──┼───────
          │   └─┘  │◄─ High Resistance             │   │       │◄─ Full Diameter
   ───────┴────────┴───────                 ───────┴───┴───────┴───────
     [ Nicked Copper Core ]                    [ Intact Copper Core ]
Think of a copper wire as a multi-lane highway for electrons. Scoring the conductor with a knife is like suddenly closing two out of three lanes. The restricted pathway increases electrical resistance, creating localized thermal hot spots that can degrade wire nuts, melt insulation, and eventually trigger arc faults behind your drywall.
Using a calibrated wire stripper tool eliminates this risk by cutting exclusively through the non-conductive jacket while leaving the internal metal conductor completely untouched.
-
Preserves Conductor Cross-Section: Maintains full current-carrying capacity (ampacity) without creating weak points prone to metal fatigue.
-
Prevents Strand Shear: On stranded wire, it prevents individual copper filaments from being accidentally severed during the strip.
-
Standardizes Strip Length: Integrated depth stops ensure consistent exposure lengths for quick terminal block insertion and wire nut twisting.
-
Accelerates Workflow Speed: Allows you to strip a wire cleanly in under two seconds, dramatically scaling your efficiency on multi-outlet rewiring projects.
Decoding Tool Mechanics: Selecting the Right Wire Stripper Tool
Walk down the tool aisle of any building supply center, and you will find dozens of variations. Choosing the right wire stripper tool depends on the complexity of your maintenance tasks and the volume of connections you need to make.
 [ Handles & Grip ]
        │
        ▼
 [ Pivot Point & Spring ] ──► Reduces Hand Fatigue
        │
        ▼
 [ Precision AWG Notches ] ──► Matches Specific Wire Diameters
        │
        ▼
 [ Shearing Jaws / Plier Tip ] ──► Bends & Loops Solid Wire
1. Manual Gage-Notched Wire Strippers
These feature a series of precision-milled cutting holes stamped with corresponding American Wire Gauge (AWG) numbers. You place the wire into the matching notch, squeeze the handles, and pull away the insulation slug. They are lightweight, extremely durable, and ideal for standard residential branch circuit work.
2. Self-Adjusting Automatic Wire Strippers
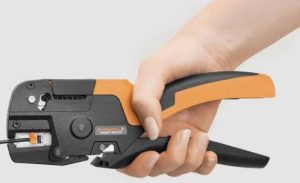
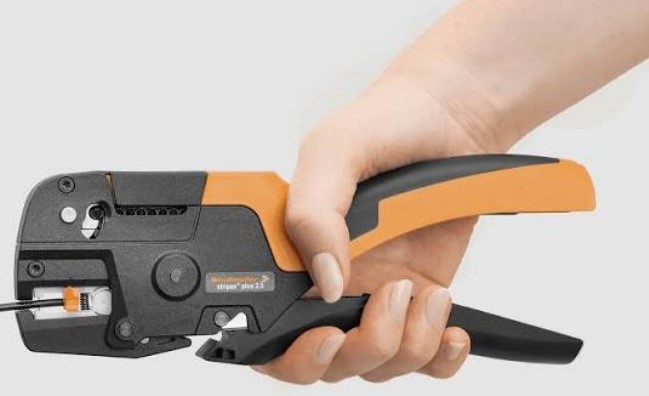
If you are wiring a whole workshop panel or installing dozens of recessed light fixtures, an automatic wire stripper tool is a game-changer. You insert the wire into compound jaws, squeeze the trigger, and the tool automatically grips the wire and strips the insulation in a single motion without requiring manual gauge selection.
3. Multi-Function Electrical Hybrid Pliers
Popular among trade professionals, these combine a wire stripper tool, needle-nose pliers, wire cutters, crimpers, and small bolt shears into one frame. They allow you to cut, strip, loop, and fasten conductors without reaching into your tool pouch for a different tool every thirty seconds.
Solid Wire vs. Stranded Wire: Mastering Gauge Notches
One of the most frequent mistakes beginners make when using a wire stripper tool is ignoring the dual markings on the cutting jaws. Residential wiring typically utilizes two distinct conductor types: solid wire (single thick core) and stranded wire (multiple thin copper strands bundled together).
Because stranded wire has a slightly larger overall outer diameter than solid wire of the same gauge, high-quality tools feature separate scale markings for each type.
┌─────────────────────────────────────────────────────────┐
│              AWG SELECTION QUICK-GUIDE                 │
└─────────────────────────────────────────────────────────┘
  • 14 AWG Solid    ──► Use 14 Solid / 16 Stranded Notch
  • 12 AWG Solid    ──► Use 12 Solid / 14 Stranded Notch
  • 10 AWG Solid    ──► Use 10 Solid / 12 Stranded Notch
If you place 14 AWG stranded wire into a 14 AWG solid notch, the blades will bite into the outer copper filaments, slicing them off. Over time, losing those outer strands drops a 15-amp rated circuit down to a dangerous load capacity. Always double-check your wire type against the tool’s stamped markings before applying pressure.
Wire Stripper Tool vs. Improvised Stripping Methods
Understanding how a dedicated precision tool compares to improvised options highlights why proper equipment is essential for modern home maintenance.
| Performance Metric | Wire Stripper Tool | Utility Knife | Lineman / Side Pliers |
| Stripping Speed | Ultra-Fast (< 2 Seconds) | Slow (15–30 Seconds) | Moderate (5–10 Seconds) |
| Conductor Damage Risk | Zero (When Matched) | Extremely High | High (Requires Feel) |
| Clean Cut Quality | Flush, Square Cut | Jagged / Feathered | Pinched / Flattened |
| User Safety Index | High (Enclosed Blades) | Low (Exposed Razor) | Moderate |
| Average Tool Cost | $12 – $35 | $5 – $12 | $15 – $40 |
Expert Advice: Trade Secrets and Critical Pitfalls
Over my decade working on field installations, I have established a set of essential rules for maintaining wire integrity during panel upgrades and fixture replacements.
1. Pro Tip: The “Squeeze and Twist” Technique
When working with aging, sun-baked, or weather-hardened wire insulation, do not simply squeeze and pull straight off. Instead, squeeze the wire stripper tool into the proper notch, rotate the handles 90 degrees left and right to score the circumference evenly, and then slide the insulation sleeve off smoothly. This prevents stretching the jacket material.
2. Pro Tip: Use Built-In Shearing Holes for Box Screws
Most hybrid wire strippers include threaded holes near the pivot hinge designed specifically for cutting 6-32 and 8-32 electrical box screws. Threading the long outlet screw through the hole and squeezing the handles cleanly shears the steel screw without destroying its thread pattern.
⚠️ The “Nicked Conductor Trap” (Hidden Warning)
If you ever notice a visible score line or shiny scratch across a solid copper conductor after stripping it, do not proceed with the installation.
Copper work-hardens when bent. A scored wire bent around an outlet screw will focus mechanical stress directly at that scratch, causing the end of the wire to snap off inside the wall later when you push the outlet back into the junction box. If you nick a wire, cut the damaged section off completely and re-strip it correctly.
Precision electrical work is not about raw force—it is about repeatability, speed, and uncompromising safety standards. By replacing makeshift blades with an engineered wire stripper tool, you eliminate the hidden hazards of nicked conductors, speed up your home improvement projects, and build electrical infrastructure designed to last for decades.
Are you preparing to tackle a home rewiring project, install smart lighting, or build out a garage workshop circuit? Share your questions or current electrical setups in the comments below—I would love to help you choose the right gear for your project!