Last summer, I inspected a commercial auto restoration facility where the owner had spent over $12,000 on a shiny, solid-color epoxy floor just two years prior. What greeted me at the bay doors was an absolute nightmare: dark, tire-shaped gouges where hot rubber had torn the coating off the slab, surrounded by severe yellowing and spiderweb cracks. The floor was literally flaking away into fine, chalky dust every time a vehicle pulled inside.
In my ten-plus years of hardening industrial and residential floors, I have learned that bare concrete or single-coat paint simply cannot withstand real-world mechanical abuse. If you want a floor that endures dropped tools, rolling loads, and chemical spills while maintaining a high-end finish, the secret lies in a multi-layered system reinforced with epoxy floor flakes.
Beyond Aesthetics: How Epoxy Floor Flakes Reinforce Concrete Physics
Many homeowners and facility managers view vinyl chips purely as a decorative option to make a garage look like a granite showroom. However, in professional floor engineering, epoxy floor flakes serve a critical structural function.
Think of a basic epoxy coating as a sheet of glass—it is hard, but a sharp point impact can crack it easily. Adding a dense layer of epoxy floor flakes is like embedding fiberglass webbing into a boat hull or steel rebar into poured concrete. The flakes form a flexible, multi-layered composite matrix that absorbs, diffuses, and distributes point loads across the surface.
  [ Clear Polyaspartic Topcoat ]   ◄── UV & Scratch Resistance
                │
                ▼
  [ Dense Layer of Vinyl Flakes ]  ◄── Impact Absorption & Traction Matrix
                │
                ▼
  [ 100% Solids Epoxy Basecoat ]   ◄── High-Strength Mechanical Bond
                │
                ▼
 [ Profiled Concrete Substrate ]  ◄── CSP 2 to 3 Mechanical Anchor
Key Engineering Benefits of Vinyl Chip Systems:
-
Impact and Fracture Dispersion: The overlapping layer of vinyl polymer flakes cushions mechanical impacts from dropped tools, jacks, and heavy equipment.
-
Built-in Slip Resistance: Unlike flat high-gloss coatings that turn slick when wet with oil or water, a full broadcast of flakes creates a micro-textured, multi-directional anti-slip surface.
-
Surface Defect Camouflage: The chaotic visual pattern completely hides minor slab pitting, hairline cracks, and telegraphing joints that usually ruin solid-color floors.
-
Chemical Barrier Reinforcement: Specially formulated vinyl chips resist degradation from motor oil, brake fluid, battery acid, and harsh de-icing salts.
The Science of Surface Prep: Mechanical Bonding & CSP Ratings
The most high-grade epoxy floor flakes and resin formulations will fail prematurely if applied over an improperly prepared concrete slab. Roughly 90% of all resinous floor failures stem from poor substrate preparation rather than material defects.
To achieve a permanent bond, raw concrete must be mechanically abraded to create an open capillary network. The International Concrete Repair Institute (ICRI) classifies this surface texture using Concrete Surface Profile (CSP) ratings.
-
Target CSP Rating: For a full-broadcast chip system, you must achieve a CSP 2 to CSP 3 rating, which feels roughly like 60-grit sandpaper to the touch.
-
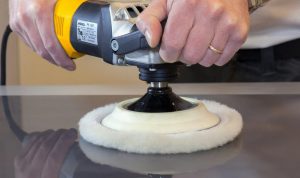
Diamond Grinding vs. Acid Etching: Always opt for mechanical planetary diamond grinding over chemical acid etching. Etching introduces excess water into the slab and fails to open tough power-troweled concrete surfaces effectively.
-
Moisture Vapor Transmission (MVT) Testing: Always test your slab for rising moisture using a Calcium Chloride test or relative humidity probe. If water vapor pressure exceeds 3 lbs per 1,000 sq. ft. over 24 hours, you must install a specialized MVT epoxy primer before laying down your basecoat.
Step-by-Step Installation: Achieving Full Broadcast Density
Applying epoxy floor flakes requires a systematic approach, precise timing, and an understanding of pot life—the amount of time you have to work with liquid resin before it hardens.
┌─────────────────────────────────────────────────────────┐
│            FULL BROADCAST APPLICATION PROCESS           │
└─────────────────────────────────────────────────────────┘
  1. Grind slab to CSP 2-3; vacuum dust completely.
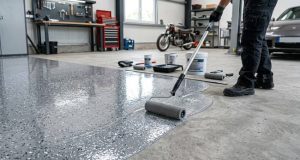
  2. Roll out 100% solids epoxy basecoat mixed with pigment.
  3. Broadcast vinyl flakes UPWARD into the air until saturated.
  4. Allow basecoat to cure completely (8-12 hours).
  5. Flat-blade scrape excess flakes; vacuum loose chips.
  6. Apply clear polyaspartic topcoat with a squeegee & roller.
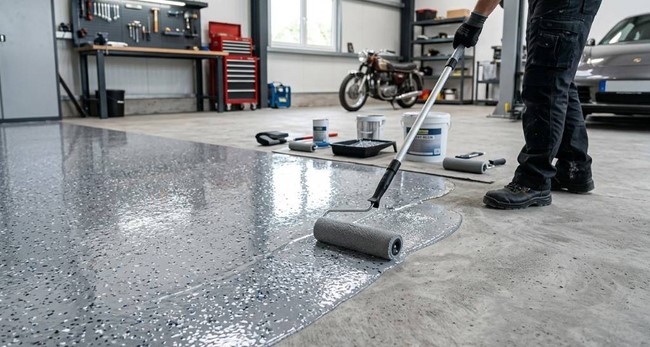
When throwing flakes, the gold standard is a full broadcast to refusal. This means tossing the chips high into the air—allowing them to rain down evenly into the wet basecoat—until no wet epoxy is visible on the surface.
Once the basecoat fully cures, worker teams walk the floor using flat-blade floor scrapers held at a 45-degree angle. Scraping shears off any standing vertical flakes, smoothing out sharp edges while preserving the rich, granite-like texture before applying the final clear protective coat.
Epoxy Floor Flakes vs. Alternative Flooring Systems
Selecting the right industrial floor hardening solution requires balancing impact strength, long-term maintenance, and upfront installation costs.
| Performance Metric | Full Broadcast Epoxy Flakes | Solid Color Neat Epoxy | Polished Concrete | DIY Water-Based Paint |
| Impact & Wear Resistance | High | Moderate | High | Ultra-Low |
| Traction / Slip Safety | High (Built-In Texture) | Low (Slick When Wet) | Very Low | Low |
| Hot-Tire Pickup Defense | Exceptional | Moderate | N/A | Fails Quickly |
| Stain & Oil Resistance | Impermeable | High | Moderate (Requires Sealer) | Poor |
| Expected Service Life | 15 – 20+ Years | 5 – 8 Years | 10 – 15 Years | 1 – 2 Years |
Expert Advice: Field Insights and Critical Warnings
Over my decade in the field, I have logged countless hours on knee pads working with polymer resins. Here are a few trade secrets and hidden warnings that can save your project from disaster.
1. Pro Tip: Upgrade to a Clear Polyaspartic Topcoat
While standard epoxy works well for the colored basecoat, never use clear epoxy as your final wear layer. Epoxy yellows under sunlight exposure and scratches easily under fine grit foot traffic. Instead, topcoat your epoxy floor flakes with a clear polyaspartic aliphatic finish. Polyaspartics are 100% UV-stable, cure three times faster than epoxy, and deliver superior chemical resistance.
2. Pro Tip: Don’t Skimp on the Scraping Phase
Skip the flat-blade scrape, and your finished floor will feel like coarse 40-grit sandpaper under bare feet. Aggressive scraping flattens the chips into an interlocking tile-like matrix while drastically reducing the volume of expensive clear topcoat required to seal the floor smoothly.
⚠️ Hidden Warning: The Hot-Tire Pickup Trap
If you park a vehicle on a newly finished floor that utilized cheap water-based or solvent-based retail garage paint, the residual heat and plasticizers in the tires will soften the coating. When you pull the car out the next morning, the cooling rubber contracts and rips the paint right off the concrete. Using a high-solids epoxy basecoat fully saturated with epoxy floor flakes creates a heat-resistant thermal barrier that completely eliminates hot-tire pickup.
Investing in an engineered floor hardening system is one of the smartest upgrades you can make to any high-traffic residential or commercial space. By combining proper diamond grinding preparation, a high-solids basecoat, a dense layer of epoxy floor flakes, and a clear polyaspartic seal, you create a seamless, indestructible surface that looks incredible for decades.
Are you preparing to revamp your garage, workshop, or commercial facility floor? Share your slab condition, square footage, or technical questions in the comments below—I would love to help you design the perfect installation strategy!