I remember walking into a client’s garage last summer and literally having to parkour over a mountain of plastic bins, a tangled mess of holiday lights, and three kayaks just to reach the workbench. It’s a classic suburban tragedy: we have a two-car garage, yet the cars are relegated to the driveway because the “floor is lava”—covered in everything we own but don’t use daily.
In my ten years of retrofitting homes, I’ve realized that most people look at their garage and see a storage unit. I look at a garage and see a missed opportunity hanging right over their heads. When you run out of floor space, the only way to go is up.
The garage ceiling hoist is the ultimate game-changer for vertical storage. It’s not just a shelf; it’s a mechanical advantage that turns that dead air space into a high-capacity warehouse. Let’s dive into how you can stop tripping over your gear and start utilizing the most underused square footage in your home.
Why the Garage Ceiling Hoist is a Vertical Storage Powerhouse
Standard overhead racks are great, but they have one massive flaw: you need a ladder to use them. For a beginner, wrestling a 50-pound storage tub while standing on the third rung of a shaky stepladder is a recipe for a weekend in the ER.
A garage ceiling hoist solves this by bringing the storage to you. Using a system of pulleys and cables, these units allow you to lower a platform or specific hooks to waist level, load them up, and then crank them back up to the rafters with minimal effort.
Think of it like an elevator for your stuff. Instead of your garage being a cluttered junk drawer, it becomes a high-efficiency docking station. Whether you are storing heavy specialized equipment or seasonal decor, a hoist system scales your capacity without sacrificing accessibility.
Technical Breakdown: How Hoists Actually Work
To the uninitiated, a hoist looks like a confusing web of ropes. But mechanically, it relies on simple physics—specifically, mechanical advantage. Most residential hoists use a 4:1 or even a 2:1 lifting ratio.
-
-
Pulley Ratios: This means that for every 4 pounds of weight on the platform, you only feel like you’re pulling 1 pound. It’s the difference between straining your back and a smooth, controlled lift.
-
Winch Mechanisms: You’ll typically find two types: manual hand-cranks and motorized electric units. Manual ones are budget-friendly and reliable, while electric hoists offer “push-button” luxury for those who don’t want a bicep workout every time they need their camping gear.
-
Safety Locks: High-quality systems feature an auto-locking brake. If the rope slips out of your hand, the gear doesn’t come crashing down on your hood; the internal teeth catch the cable instantly.
-
Choosing the Right System: Capacity and Configuration
Before you drill a single hole, you need to understand what you’re trying to lift. Not all garage ceiling hoists are created equal.
1. Platform Hoists
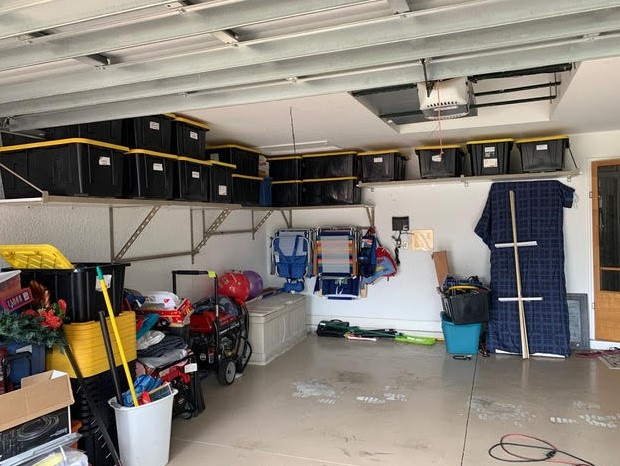
These are the “SUVs” of garage storage. They usually feature a 4×4 foot wire grid or solid platform. These are perfect for storing bins, coolers, and those bulky boxes of holiday ornaments that you only touch once a year.
2. Specialized Hook Hoists
If you’re an outdoor enthusiast, you don’t need a platform; you need specific mounting points. There are dedicated hoists for:
-
Kayaks and Canoes: Designed to cradle the hull without warping the plastic.
-
Bicycles: Lifting by the seat and handlebars to keep tires off the ground.
-
Roof Boxes/Cargo Carriers: Perhaps the best use of a hoist, as these are notoriously difficult to store on the ground without scratching them.
3. Heavy-Duty Motorized Lifts
For the “intermediate” DIYer who has a lot of heavy gear, motorized lifts can handle up to 400 lbs or more. These often come with a remote or a wall-mounted switch, making the process completely effortless.
Installation 101: Finding Your Joists
The biggest fear I hear from homeowners is: “Will my ceiling collapse?” The short answer is no—provided you anchor into the ceiling joists, not just the drywall.
Drywall is essentially compressed chalk; it has zero structural integrity for hanging weight. To install a garage ceiling hoist safely, you must use a high-quality stud finder to locate the center of your wooden joists.
Pro Tip from the Field: Most modern garages use “TJI” joists or engineered trusses. These are incredibly strong but require specific types of lag bolts. Always pre-drill your pilot holes. If you try to drive a large lag bolt into a 2×4 without a pilot hole, you risk splitting the wood, which compromises the entire support system.
Maximizing Every Inch: The “Zoning” Strategy
To truly scale your capacity, you shouldn’t just slap a hoist in the middle of the room. I teach my clients the “Zone Method”:
-
The Dead Zone: This is the area directly above your garage door when it’s open. Many people don’t realize there is often 12-24 inches of clearance there. It’s the perfect spot for low-profile platform hoists.
-
The Perimeter: Use the areas above the hood of your car. Since the hood is lower than the roof of the car, you can hang items lower in this “air pocket” without hitting your vehicle.
-
The Center Isle: Save the very center of the garage for items you need to access more frequently, as this is usually where you have the most head clearance.
Hidden Dangers: What the Instruction Manual Won’t Tell You
Even the best garage ceiling hoist can become a liability if you aren’t careful. Over the years, I’ve seen two major mistakes that lead to “storage disasters.”
The “Uneven Load” Trap:
If you load all your heavy weights (like dumbbells or bags of salt) on one side of a platform hoist, the cable tension becomes uneven. This can cause the platform to tilt during the lift, potentially dumping your gear onto your car. Always distribute weight from the center outward.
The Heat Factor:
Remember that heat rises. In the middle of summer, the temperature near your garage ceiling can be 20-30 degrees hotter than at floor level. Avoid storing sensitive items like pressurized cans (spray paint), delicate electronics, or expensive wine in your overhead hoist. Stick to hard goods, plastics, and metals.
Safety and Maintenance: The “Set and Forget” Myth
A hoist is a machine, and like any machine, it needs a quick check-up once a year. I always tell my clients to do a “Cable Audit” every spring.
Lower the hoist and inspect the steel cables for fraying or “bird-caging” (where the strands start to unwind). If you see a single broken wire, replace the cable immediately. Also, a tiny drop of lithium grease on the pulley axles can prevent that “nails-on-a-chalkboard” screeching sound and ensure a smooth operation for another decade.
Conclusion: Take Back Your Floor Space
The garage is often the final frontier of home organization. By installing a garage ceiling hoist, you aren’t just cleaning up; you’re upgrading your home’s infrastructure. You’re moving from a cluttered 2D floor plan to a high-capacity 3D storage environment.
Imagine being able to actually park your car in the garage during a hailstorm, or having enough floor space to start that woodworking project you’ve been dreaming about. That is the power of vertical scaling.
Ready to look up? Start by measuring the height of your ceiling today. If you have more than 8 feet of clearance, you’re a prime candidate for a hoist system.
What’s the most awkward item currently taking up space on your garage floor? A kayak? A mountain of bins? Leave a comment below or share this article with a friend who can’t find their lawnmower under all their “stuff”!