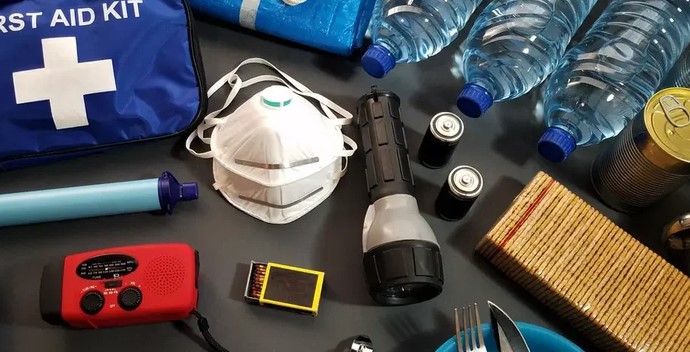
Two years ago, during a routine kitchen renovation on a Friday afternoon, a sub-contractor sheared a finger on a sharp edge of exposed metal trim. Panicked, we sprinted to the garage where the toolboxes were kept, only to find the portable emergency kit buried under three heavy crates of tile grout. By the time we dug it out and unlatched the plastic box with dusty hands, five crucial minutes had vanished.
That close call changed how I approach home safety forever. Most homeowners treat emergency kits like winter coats—stashed away in deep closets, under bathroom sinks, or tucked in the attic until disaster strikes. In a high-stress scenario, searching through drawers is a structural failure of your home safety protocol.
Mounting a dedicated First Aid Wall is not just an aesthetic upgrade; it is a tactical deployment strategy that transforms reactive panic into immediate, life-saving action.
Why the First Aid Wall Outperforms Traditional Mobile Kits
When adrenaline surges, fine motor skills degrade and cognitive clarity drops significantly. Searching for a dark blue canvas pouch inside a dark utility closet is a recipe for delay.
Think of a First Aid Wall like a fire extinguisher mounted in a hallway. It provides visual permanence—a fixed, dedicated spatial anchor that your brain registers every single day until accessing it becomes pure muscle memory.
+-------------------------------------------------------------+
|               TACTICAL ACCESSIBILITY METRICS                |
+-------------------------------------------------------------+
| Feature           | Standard Mobile Kit | First Aid Wall    |
+-------------------+---------------------+-------------------+
| Retrieval Time    | 45 – 120 Seconds    | 5 – 10 Seconds    |
| Visual Sightline  | Hidden / Variable   | 100% Unobstructed |
| Contamination Risk| High (Floor/Drawer) | Low (Elevated)    |
| Inventory Auditing| Requires Unpacking  | At-a-Glance Check |
+-------------------+---------------------+-------------------+
Visual Ergonomics and Accessibility
In the home improvement industry, we design spaces around “traffic flows” and “action zones.” A mobile kit breaks this flow because its location shifts depending on who used it last.
A wall-mounted cabinet or modular board establishes a centralized command center. Visitors, babysitters, and children do not need to ask where supplies are stored—the unit remains continuously visible within primary thoroughfares.
Strategic Placement: Mapping Your Home’s High-Risk Zones
Location determines utility. Mounting your station in a remote guest room or behind a pantry door completely defeats the purpose.
       [ KITCHEN / UTILITY ZONE ]
                   │
                   ▼ (High-Risk Hub)
     ┌───────────────────────────┐
     │   PRIMARY FIRST AID WALL  │
     └───────────────────────────┘
                   ▲
                   │ (Direct Sightline)
         [ MAIN HALLWAY / GARAGE ]
High-Traffic vs. High-Risk Areas
-
The Kitchen Corridor: Over 60% of domestic injuries—ranging from severe lacerations to high-grade thermal burns—occur in the kitchen. Position your setup just outside the immediate cooking zone to avoid heat damage to adhesive bandages and medications, yet close enough for immediate reach.
-
The Garage or Workshop Entry: Power tools, chemical solvents, and heavy materials carry distinct risk profiles. Mount a secondary board right beside the primary exit door.
-
Central Hallway Access: If you are opting for a single home installation, place it in the central hallway on the main living floor, positioned at an eye-level height of 48 to 60 inches.
Pro Tip: Never mount a medical cabinet directly inside a full bathroom. Constant moisture and temperature spikes from hot showers rapidly degrade sterile packaging, ruin adhesive tapes, and reduce the shelf-life of topical ointments.
Anatomy of a Professional-Grade First Aid Wall
A board covered in loose bandages is ineffective. A proper installation relies on modular organization and industrial-grade mounting systems.
+-------------------------------------------------------------+
|                      WALL LAYOUT SCHEMATIC                  |
+-------------------------------------------------------------+
| [ TOP TIER ]   : High-Intensity Lighting & Emergency Comms  |
| [ MIDDLE TIER ]: Major Trauma, Hemostatic Dressing, Shears  |
| [ LOWER TIER ] : Daily Care, Burn Gel, Antiseptic Modules   |
+-------------------------------------------------------------+
Modular Wall Panels vs. Rigid Enclosures
You have two primary hardware paths when constructing your setup:
-
Heavy-Gauge Steel Cabinets: Ideal for dusty environments like workshops or garages. Look for powder-coated steel units with internal divider shelves and clear door labels.
-
Tactical Metal Pegboards or Slatwalls: Preferred for residential utility rooms. Steel pegboards allow you to attach color-coded pouches using heavy-duty Velcro or magnetic brackets, enabling quick “grab-and-go” capabilities during an emergency.
Essential Components Architecture
Divide your wall setup into distinct visual modules:
-
Trauma & Bleeding Control: Hemostatic gauze, pressure dressings, elastic wraps, and trauma shears.
-
Burn Management: Sterile burn sheets, hydrogel packs, and non-adherent pads.
-
Topical & Antiseptic: Povidone-iodine swabs, isopropyl alcohol wipes, and antibiotic ointments.
-
Instrumentation: Nitrile gloves (avoid latex due to allergen risks), medical penlights, tweezers, and CPR face shields.
Installation Blueprint: Secure Mounting Step-by-Step
A fully stocked medical cabinet can weigh anywhere from 8 to 25 pounds. Securing it correctly ensures it stays put when pulled forcefully open in a rush.
      [ Wall Stud ]              [ Drywall Only ]
            │                           │
            ▼                           ▼
    Wood Screw (2.5")          Toggle Bolt (1/4")
  (Supports > 100 lbs)        (Supports ~ 50 lbs)
-
Locate Wall Studs: Use an electronic stud finder to locate vertical wall framing studs. Fastening at least one side of your enclosure into a solid wood stud is critical.
-
Anchor Selection: If mounting on hollow drywall where studs aren’t aligned, skip plastic expansion anchors. Use heavy-duty toggle bolts (1/4-inch diameter) rated for a minimum of 50 pounds of shear load.
-
Mounting Height: Position the center of the unit 54 inches from the finished floor. This keeps it accessible for adults and teenagers while remaining out of reach of toddlers.
-
Lighting Integration: Mount a motion-activated LED puck light directly above or inside the cabinet. If power grid failures occur during a storm, your safety station must remain self-illuminated.
System Maintenance and Supply Lifecycle
An outdated safety station offers false security. Expired ointments fail, adhesive tapes dry out, and sterile seals break over time.
+-------------------------------------------------------------+
|                 QUARTERLY MAINTENANCE CHECKLIST             |
+-------------------------------------------------------------+
| [ ] Inspect sterile seal integrity on gauze and dressings.  |
| [ ] Verify expiration dates on gels, eyewash, & topicals.   |
| [ ] Test battery levels on integrated LED lights.           |
| [ ] Replenish depleted items from recent minor scrapes.     |
+-------------------------------------------------------------+
Implement a quarterly maintenance schedule on the first day of every season. Keep a laminated inventory checklist inside the door and use a permanent marker to log inspection dates.
Building a Culture of Preparedness at Home
Installing hardware is only half the battle; ensuring everyone in your household knows how to use it completes the system.
Take 20 minutes with your family or housemates to walk through the system. Show them how the cabinet opens, explain where specific items are located, and practice retrieving trauma shears or burn dressings. When physical infrastructure matches personal readiness, your home becomes a significantly safer place to live.
How is your current home emergency kit configured? Have you mounted a dedicated station, or is it still stored away in a drawer? Share your setup, questions, or custom mounting ideas in the comments below!