You’ve just spent three weekends meticulously sanding, priming, and applying a buttery-smooth coat of “Midnight Navy” to your kitchen cabinets. It looks incredible. But as you move to paint the ceiling, a single, rogue drop of white latex falls, bounces off a plastic drop cloth, and splatters right across your masterpiece. In that split second, your “DIY win” turns into a “DIY disaster.”
I’ve spent over a decade on jobsites, and if there is one thing I’ve learned, it’s that painting is 80% preparation and only 20% actually moving the brush. Beginners often think a few old newspapers or a thin sheet of plastic is enough to protect their surfaces. It isn’t. Professionals rely on Painter Masking Paper—the unsung hero of a flawless finish.
In my early years, I made the mistake of “winging it” with cheap protection. I ended up spending more time cleaning up overspray and drips than I did painting. Now, I never start a project without a roll of high-quality masking paper by my side. It is the literal barrier between a professional result and a messy headache.
Why Plastic Isn’t Always Your Friend
When you walk into a hardware store, the first thing you see are those giant plastic drop cloths. They have their place, but for precision work—like baseboards, windowsills, and countertops—plastic is a liability.
Think of plastic like a slip-and-slide. If you drop paint on plastic, it stays wet. If you accidentally step on that wet spot and then walk across your hardwood floor, you’ve just created a trail of footprints that are a nightmare to remove.
Painter Masking Paper, on the other hand, is like a sponge with a shield. It is designed to absorb the paint so it dries quickly on the surface, preventing tracking. High-grade versions have a special treatment to prevent “bleed-through,” ensuring that even a heavy spill won’t soak through to the surface below.
Choosing the Right Weight: The Technical Specs
Not all paper is created equal. If you grab the wrong type of Painter Masking Paper, you’re either wasting money or risking your finishes. In the industry, we categorize paper by color and weight.
1. Brown Kraft Paper (General Purpose)
This is the “Old Reliable” of the painting world. It’s thicker, heavier, and perfect for protecting floors and large furniture.
-
Best for: Heavy-duty foot traffic and floor protection.
-
LSI Terms: Look for 60lb weight for floor runs and 30lb for general masking.
2. Green Masking Paper (Overspray Specialist)
This is a thinner, more flexible paper. It is specifically engineered to resist the solvents found in oil-based paints and lacquers.
-
Best for: Masking off trim, windows, and using with a hand-masking tool.
-
Technical Detail: It has a much higher fiber density, which prevents “wicking”—where paint travels along the paper fibers to reach the edge.
3. Red Rosin Paper
You’ll see this often in new construction. It’s very thick and provides a bit of a “cushion.”
-
Expert Insight: Be careful with Red Rosin. If it gets wet, the red dye can actually bleed into some porous surfaces like light-colored marble or unfinished wood. Stick to Brown Kraft for those sensitive areas.
The Art of the Mask: Scaling Your Efficiency
If you want to move like a pro, you need to stop tearing bits of tape and paper by hand. We use a Hand-Masker. This tool applies the tape directly to the edge of the Painter Masking Paper as you pull it from the roll.
Using a hand-masker is like using a sewing machine for your walls. It creates a perfectly sealed edge in seconds. For beginners, this might seem like an unnecessary expense, but if you have more than one room to paint, it will save you hours of back-breaking labor.
The Vertical Shield Technique
When I’m painting a ceiling, I don’t just cover the floor. I create a “skirt” of Painter Masking Paper that hangs about 12 inches down the wall. This protects the wall finish from the fine mist of a roller or the “spatter” that occurs when you’re moving fast.
Format Scannable: The Pro Prep Checklist
To ensure your surface finish protection is bulletproof, follow this systematic workflow:
-
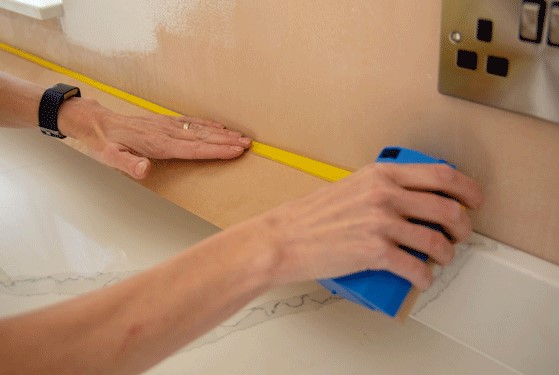
Clean the Edge: Tape will not stick to dusty baseboards. Wipe the top edge of your trim with a damp microfiber cloth and let it dry.
-
The Overlap Rule: When laying paper on the floor, overlap your seams by at least 3 inches and tape the entire seam. Paint has a way of finding the tiniest gap.
-
Static Guard: When using paper near electronic equipment or in very dry environments, avoid “sliding” the paper across the floor rapidly, as it can build up static.
-
Check the “Bleed-Through” Rating: Ensure your paper is rated for the type of paint you are using (Water-based vs. Oil-based).
Tips Pro: The 45-Degree Pull
Expert Advice: The most critical moment in your project isn’t the painting—it’s the tape and paper removal. If you wait until the paint is bone-dry, you risk “chipping” the new finish. Remove your Painter Masking Paper while the paint is still slightly tacky to the touch. Pull the tape back at a 45-degree angle away from the painted edge. This creates a surgical, razor-sharp line every single time.
The Masking Tape Shadow
Never leave Painter Masking Paper taped to a surface for more than 14 days (or whatever the tape’s rating is).
I once consulted on a historic restoration where the homeowner left masking paper on the windows for a month. The sun’s UV rays “baked” the tape adhesive into the wood. We had to use chemical strippers and scrapers to get it off, nearly ruining the original trim. If your project is taking longer than expected, pull the paper and re-mask. It’s cheaper than refinishing your trim.
Surface Tension and Mechanical Bonds
From a technical standpoint, Painter Masking Paper works by managing the surface tension of the liquid paint. When a drop of paint hits the paper, the fibers break the surface tension, pulling the liquid into the substrate.
In contrast, if paint drops on a hard surface, it maintains a high profile and high surface tension, making it easier to smear. By using paper, you are effectively “grounding” the paint spills, keeping your workspace safer and your final product cleaner.
Conclusion: Respect the Prep
Quality painting isn’t about how well you can handle a brush; it’s about how well you protect what isn’t supposed to be painted. By investing in the right Painter Masking Paper and taking the time to mask your perimeters correctly, you are giving yourself the freedom to paint with confidence and speed.
Don’t let a single drip ruin weeks of hard work. Treat your prep with the same respect you treat your final coat, and you’ll find that the results speak for themselves.
What’s your biggest “oops” moment when it comes to paint spills? Did you try the old newspaper trick, or did you go straight for the pro gear? Share your stories in the comments—I’d love to help you prep for your next big project!